Lean experiment template by: Tristan Kromer
It’s been five years since we first published the Learn S.M.A.R.T. template for recording experiment results, and since then we’ve updated it a few times. Mostly these have been cosmetic changes, but it’s changed enough — and there’s been such an explosion of lean template lately — that it’s time to explain why we changed it and why we still think companies should create their own.
Here’s the lean template if you want to skip the update debrief.

Download Learn S.M.A.R.T. Template
Templates Still Suck
People really like templates. It’s one of the most common requests we get when we lead workshops — likely because we often ask people to draw their own lean template on a piece of paper, which elicits responses like this:
“Can you just give us a lean template?”
“We require structure.”
“Our company likes having a fixed process.”
Hey, I love process. But following a process is no excuse for not thinking. When teams say they love process, what they’re often saying is they just want someone (or something in this case) to tell them what to do. Blindly following standard operating procedure often leads to a lack of critical thinking and problems down the road.

What happens when our company process was designed for a situation that no longer applies? Is anyone going to change the process? Does copying another company’s process make sense? Will a template from the tech world apply to a pharmaceutical company?
No two experiments share exactly the same context. So instead of downloading and distributing someone else’s process, let’s break down why our Learn S.M.A.R.T. ntemplate is the way it is and analyze the goal of each section, and then we can decide if that makes sense in our current context. Maybe it can be simpler, maybe it needs to be more complex. Maybe we can change it and make it our own.
Must Have
The fundamentals of any lean experiment template align with the Build-Measure-Learn loop, but backwards. So at a minimum, we need a space to record three things:
- Learning Goal – What are we trying to learn?
- Data – What do we need to measure to effectively learn?
- Plan – What will we do or build to gather that data?
Running an experiment and not taking action on the data is just a waste of time, so we need to add a place to write down the Results and Next Steps as well.
These four fields make up our Learn S.I.M.P.L.E. template, which is what we use for teams just getting started with experimentation. Most templates will have these fields (or something similar) at a minimum.
Overcoming Biases
For a lot of people, the Learn S.I.M.P.L.E. template is enough, particularly for those experienced in designing well-controlled experiments.
But most of us (including here at Kromatic) need to navigate a few subtle traps when designing experiments, such as confirmation bias, selection bias, and easy-to-miss details.
Every additional field we add is designed to overcome one of these traps. But if you don’t face that trap when conducting your experiments, then you don’t need that field in your template.
(Spoiler alert: Most of these traps are in blindspots, so you don’t know you’re falling for it until someone else takes a look at your experiment and gives you an outside perspective. That’s why we do interactive online workshops instead of webinars.)
Reporting Results
Some common templates place Results and Next Steps on a separate “learnings” template used to report and present results. There’s nothing wrong with that, but we don’t recommend it. It’s too easy to be impressed by results such as “80% of our customers will buy our product.” Sounds good, right? But what is that based on? Was the experiment well-designed?
You’ve probably seen a friend share an article in the lifestyle section of your local daily promoting the latest experiment results claiming that a little red wine is just fine for your baby, vegetables are trying to kill you, and aliens have built a giant Dyson sphere. But if you dig a bit deeper and look at the article’s sources, you’ll often find one poorly written research paper and twenty other experiments that contradict it. It’s not news, it’s sciency click-bait that relies on a single, questionable source.
When running an experiment, look at the real data. Don’t get sucked in by an 80% conversion rate when only five people were tested, and four of them share your house with you.
Adding Results and Next Steps to our experiment template keeps the data and the data-collecting methods together so we can dig into the experiment design if we have any doubts about the results. And having that big blank spot staring us in the face also reminds us that the experiment isn’t done until we make a decision based on the data.
De-duplicate
We used to have two templates, one for experiments and one for research. The difference was subtle but important.


Experiments, if we’re strict with the word, must have a falsifiable hypothesis, and would give us a binary output. Is the hypothesis true or false?
(To be even stricter, that’s not quite right either. The experiment will never tell us if the hypothesis is true, but it will tell us that the hypothesis has not been proven false … yet.)
This stands in contrast to research. Research doesn’t necessarily provide a true/false answer to a clear question. Research often generates more ideas, more possibilities, and more questions. Click To Tweet If we’re lucky, research will generate a clear enough hypothesis that we can then run an experiment on.
It’s the difference between an open-ended question, where many answers are possible, and a closed-ended question, where the answers are limited to a finite list (often yes or no).

Closed-ended vs. Open-ended questions

Research doesn’t have a hypothesis, only pre-existing assumptions we must recognize so they don’t cloud the results. If we have an assumption, we can either accept the risk or convert it into a testable hypothesis. Unless there is one clear hypothesis, we can’t set strict criteria or metrics that would prove that hypothesis true or false.
To compensate for this difference in testing the different unknowns, we historically had two templates: a research template with a space for assumptions, and an experiment template with spaces for a hypothesis and a fail condition. (We’ll get into fail conditions below.)
Unfortunately, people found two templates confusing and weren’t sure when to use which. Worse, we were asking teams to decide which lean template to use before identifying their learning goal. Since the learning goal is the first step towards determining if we have a falsifiable hypothesis, this just didn’t make any sense.
So instead of having two similar templates, we combined the two onto one sheet, using a dotted line to indicate that the hypothesis and fail condition are optional.
So while marrying these into a one-sheet template makes it appear more complex, our qualitative observations on usability tell us it’s better than the two-template confusion.
(Sidenote: It’s been delightful to see some innovation platforms like GLIDR adopt these distinctions.)
Layout
The overall layout has changed a bit, and we’ve added some subtle arrows to indicate the general flow we use to fill out the template.
The learning goal is where we start, so it gets priority placement up top. From there we should write down our critical assumptions. No experiment is entirely unbiased, but writing down those assumptions is a good first step towards compensating for that bias.
If the assumptions are specific enough, we can then create a specific hypothesis and fail condition. If not, we just skip those sections.
Data
Once we have our learning goal, assumptions, and (optionally) a hypothesis, we can think about what data we need to collect.
The data can come from a variety of different metrics that we need to instrument into our test (i.e., put a system of measurement into place). Remember that data can be both quantitative numbers and qualitative insights. It could be detailed notes from an interview, a video recording of a usability session, or the number of unique visitors completing an action on our website.
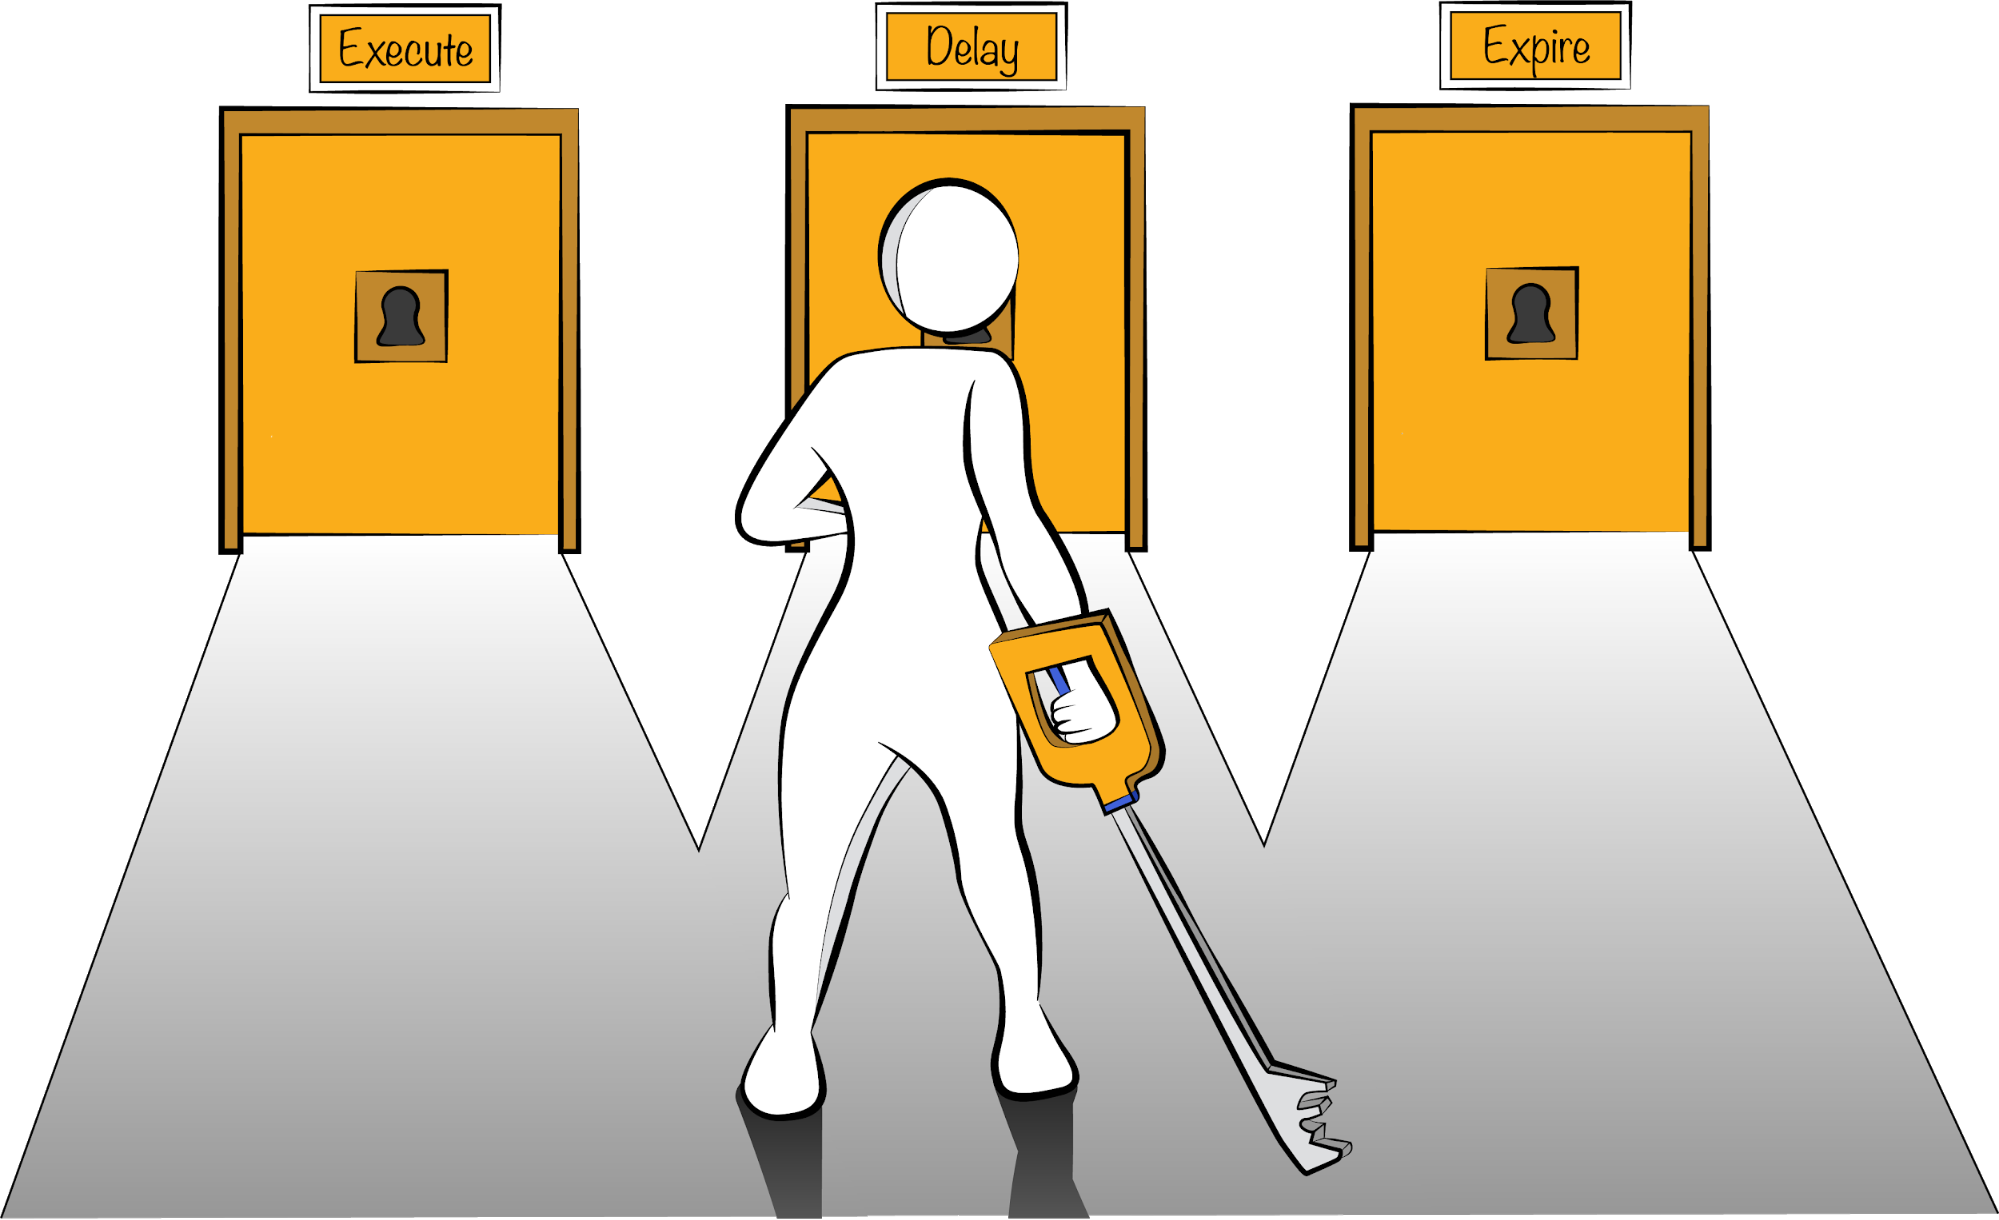
The Fail Condition, which we’ve placed on the same row as Data, should be a specific condition placed on ONE metric that could potentially prove our hypothesis false.
You may recall that lean startup borrows from science in that we can never prove a hypothesis. We can only fail to disprove it. So, instead of trying to prove a hypothesis with a success metric, we should try to disprove the hypothesis with a Fail Condition. We don’t need to be scientifically accurate, we just need to be able to prove to ourselves that our business idea is worth investing our time in.
The Fail Condition is critical to helping us eliminate our own cognitive bias and prevent the inevitable optimistic justifications that creep in when our data show less than desirable results.
Plan
We’ve tried a number of different terms for this section, but eventually just settled on plan as the simplest. What are we going to do to collect that data?
The level of detail to put here is extremely open-ended. We suggest not being too dogmatic about it, but there should be sufficient information for any team member that needs to be involved to know what is expected of them.
Just remember that there are four parts to a Minimum Viable Product (Customers, Value Proposition, Channels, and Relationship), and there are probably the same four parts to your plan. Don’t create a wonderful customer discovery guide and then forget to figure out how to reach customers.
Time Box
This section hasn’t changed much. Once we have a plan, we need to have a clear timeline for executing that plan. Most folks with a project-management background would never lay out a plan without a timeline, but it’s an easy thing to forget.
 Calling out the timing explicitly brings execution issues to the forefront, allowing us to ask, Could we do this faster?
This lets us ask helpful follow-up questions, such as Can we do the same thing with less infrastructure? Do we need that amount of data or could we run a smaller test? Do we need more resources?
If the time box is longer than one week, consider revisiting the entire design and minimizing it, or minimizing the learning goal and starting over.
Early Stop Condition
This used to be called the wtf;s! which stood for “What the f***, stop!” It’s the thing that happens right after launching your experiment that tells you something has gone horribly wrong.
For example, we have a plan to send 1,000 people to our website in the next week and check our conversion rate for signups. After one week, we have zero signups. Looking at the data more closely, we actually have zero visitors. Wtf;s!
What’s probably happened is that something is wrong with our analytics package — likely it was not installed in its entirely.
(Note: We like Heap Analytics specifically for this reason. Heap collects every click on the page, so you can rerun the goal analysis after the fact if you misconfigured something.)
“Early Stop Condition” isn’t just more clear (and corporate friendly) than “wtf,s!” — ESC is also a great acronym and my favorite keyboard destination.
Results & Insights
Results was changed to include insights, because writing down the data and observations is necessary, but insufficient. We need to know why the results happened.
If the conversion rate was lower, why was it lower? If we’ve changed our customer persona, what led us to believe in those changes?
Don’t settle for mere data — record your insights.
S.M.A.R.T. vs. S.I.M.P.L.E.
This is a pretty complicated template. We don’t always recommend others use it, but we use it religiously for our own experiments and research.
For those new to experiment design, just keep it S.I.M.P.L.E. by focusing on Learn -> Measure -> Build, which will get you 80% of the way there.
Those of you who are experts already have no need for these extra fields, because you’re already creating a Time Box and Early Stop Condition right in your Plan, you’ve already got the fail condition baked into your hypothesis, and you’re already differentiating between Assumptions & Hypotheses.
If you’re somewhere in the middle, these extra details and prompts can help you avoid that unhappy moment after you’ve run a wonderful experiment but don’t understand the data at all. Something has gone wrong, but you can’t quite tell what.  Maybe you forgot to install analytics. Maybe you didn’t set a clear fail condition. But now you’ve spent three weeks and learned nothing.
Final Thoughts
Templates are just a tool. Use the right one or build your own fit for your purpose. You can download our updated template.
Download Learn S.M.A.R.T. Template
- Don’t struggle through experiment design. Join us for an interactive online workshop and start moving forward with your ideas.
- How else we can improve the lean template? Comment below.
- Share your experiment with us and we’ll give you customized feedback.
Make better product and business decisions with actionable data
Gain confidence that you're running the right kind of tests in a five-week series of live sessions and online exercises with our Running Better Experiments program. Refine your experiment process to reduce bias, uncover actionable results, and define clear next steps.
Reserve a seat